

You might be surprised to learn that, in 2025, a significant portion of home security breaches occur due to outdated or faulty locking mechanisms. Ensuring your property’s defences are up to date is not just advisable; it’s a fundamental responsibility for every owner.
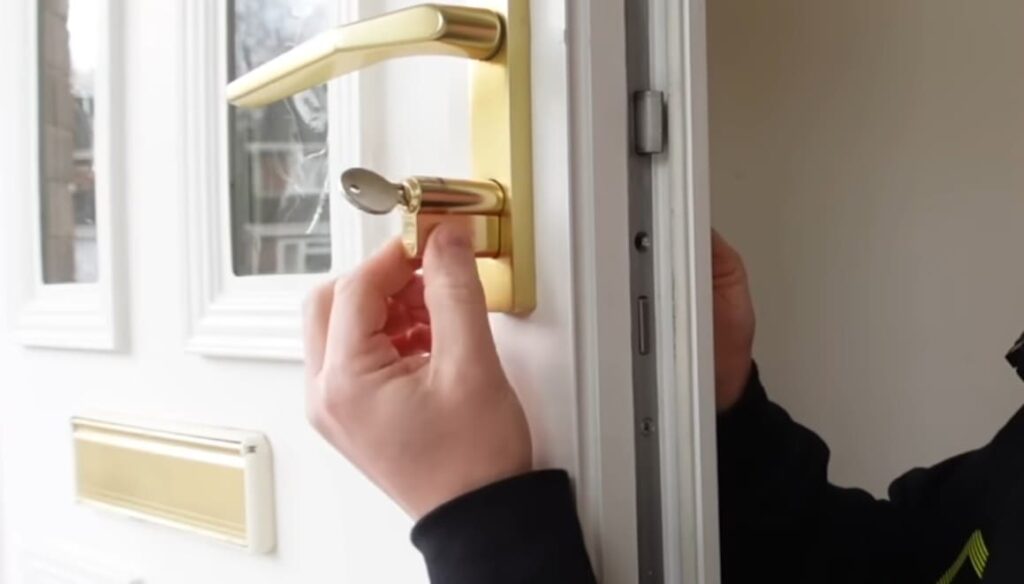
Swapping an old or compromised mechanism is a frequent maintenance job. It is a task tackled by both novices and experienced DIY enthusiasts. This process directly controls who can enter your home.
Our friendly, comprehensive guide is designed to walk you through every step. You will learn the entire procedure in a short amount of time. We focus on building your confidence from one stage to the next.
Whether you’ve just moved into a new place or are upgrading an ageing front door fixture, this resource helps you organise the project efficiently. The result is robust security and essential peace of mind, knowing access is granted only to those you trust.
Key Takeaways
- Prioritising high-level security for your property is a non-negotiable duty for responsible owners.
- Mastering this practical skill allows you to manage your front door’s access independently.
- This detailed guide provides a clear, sequential method to complete the task confidently.
- It is equally useful when moving house or upgrading an old mechanism for better safety.
- Following these instructions ensures only trusted individuals have entry, offering crucial peace of mind.
- The entire process is designed to be efficient and can be finished relatively quickly.
Introduction to Door Lock Replacement
Maintaining robust home security often begins with a clear understanding of your door’s locking mechanism. This knowledge is especially relevant for property managers across the United States. They frequently need to change door locks between tenant move-outs to uphold security standards.
You might find yourself in a similar situation. Perhaps your current hardware has suffered a malfunction. Alternatively, you may be planning an upgrade to a more advanced security system. In all these cases, grasping how your locks operate internally is the vital first step.
Professional locksmiths emphasise a simple, annual inspection. Checking for worn or damaged internal components is a wise practise. This proactive approach forms the foundation for successfully managing your property’s safety. It helps keep your home secure from potential intruders.
Understanding Different Types of Door Locks
Three common lock varieties dominate residential and commercial settings: deadbolts, lever handles, and mortise locks. Knowing their distinct features is the first step towards an informed choice for your property.
Deadbolt, Lever, and Mortise Lock Overview
For a primary entry point like your front door, a Grade 1 keyed deadbolt is highly recommended. This grade signifies it has been tested for maximum durability and offers superior tamper resistance.
A mortise lock is a heavy-duty unit housed inside a recessed pocket within the door itself. This robust design is commonly found in hotels and commercial properties where traffic is high.
Lever handle locks are frequently used in commercial buildings. They are specifically designed to be ADA-compliant, allowing easier access for all individuals.
Choosing the Right Lock for Your Home
Selecting the correct hardware depends on your specific needs. Consider the security requirements of each exterior door to prevent forced entry.
Understanding these differences ensures you pick the most appropriate solution. Always verify your chosen lock meets recognised safety standards for your family’s protection.
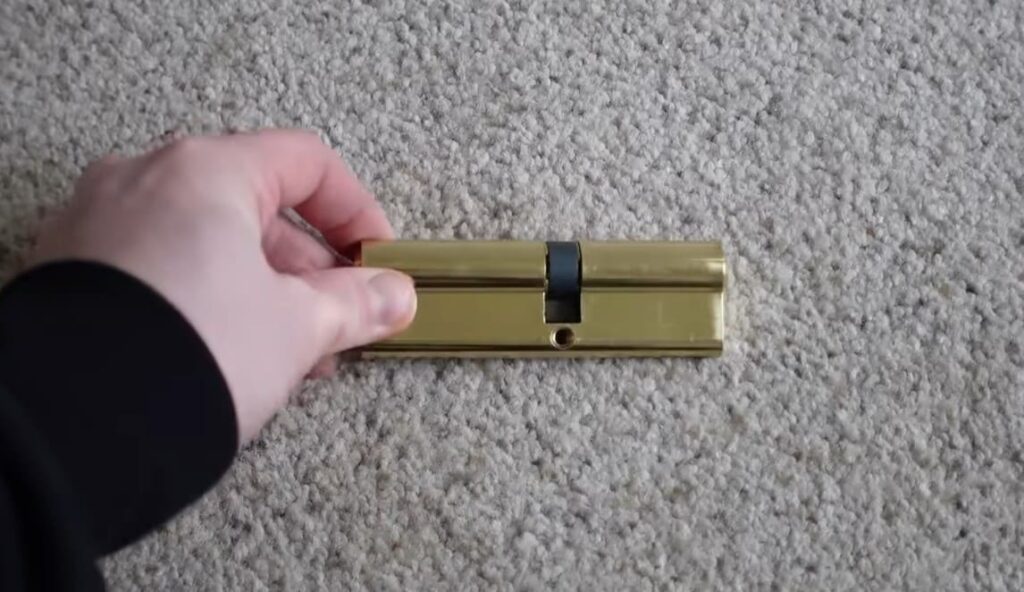
Evaluating Your Existing Lock Setup and Measurements
Two critical measurements, the backset and crossbore, form the blueprint for your replacement hardware. Getting these right is the difference between a seamless fit and a frustrating project.
Accurate evaluation prevents you from buying components that simply won’t work. It saves time and protects your door from unnecessary damage.
Measuring Backset and Crossbore
The backset is the distance from the edge of your door to the centre of the borehole. You must measure this precisely.
Standard backsets are typically 2-3/8 inches or 2-3/4 inches. Use a tape measure to check which one you have.
The crossbore is the large hole drilled through the face of the door. For most homes, this diameter is a standard 2-1/8 inches.
| Measurement Type | Description | Standard Size(s) |
|---|---|---|
| Backset | Distance from door edge to centre of borehole | 2-3/8″ or 2-3/4″ |
| Crossbore Diameter | Width of the main hole through the door face | 2-1/8″ |
| Door Thickness | Overall depth of the door itself | 1-3/8″ to 1-3/4″ |
Identifying the Current Door Hardware
Knowing your existing lock type is essential. Choosing the wrong style can result in a poor fit.
Always record your door’s thickness. Most residential doors measure between 1-3/8 and 1-3/4 inches.
If you discover an oversized hole, a strike reinforcer can solve the problem. This ensures your new mechanism is secure and aligned.

These accurate figures are the foundation for a successful installation. They prevent costly adjustments or returns later on.
Tools and Materials Needed for Door Lock Replacement
The right collection of metal tools transforms a potentially tricky job into a straightforward DIY project. Proper preparation is the cornerstone of a smooth upgrade. Having everything organised before you start prevents mid-task delays.
Essential Tools and Equipment
A Phillips-head screwdriver is your primary tool for most residential fittings. You will use it to fasten the mounting screws. Keep a flat-head screwdriver nearby for any slotted fasteners you encounter.
Accurate measurement is crucial. A reliable tape measure ensures your new hardware aligns perfectly. A power drill is invaluable for making minor adjustments or driving screws efficiently.
For mortise lock systems, a sharp chisel and hammer are necessary. They help clear the recessed pocket in the door. A utility knife tidies old paint or debris for a flush fit. A small level guarantees your mechanism operates smoothly.
Gathering these tools beforehand saves significant time. It allows you to focus on the task of installing your new unit correctly the first time.
Step-by-Step Guide to Replace a Door Lock
The preparatory phase is critical for ensuring your upgraded security system functions flawlessly. This guide breaks the procedure into clear, manageable stages. It all begins with removing the interior faceplate from your existing mechanism.
Preparing the Door and Hardware
Using your Phillips-head screwdriver, carefully unscrew the faceplate. Set the screws aside safely. You can then detach the door handle or knob from the assembly.
Gently slide the old lock unit out of the entryway. Take care not to damage the surrounding wood or finish. Inspect the cavity for any debris or splintering.
Clearing this space ensures your fresh hardware sits flush against the surface. For a mortise lock, you must first extract the lock body from its pocket.
This groundwork guarantees the smooth operation and secure fit of your upgraded mechanism. Proper preparation is the foundation of reliable home security.
how to replace a door lock
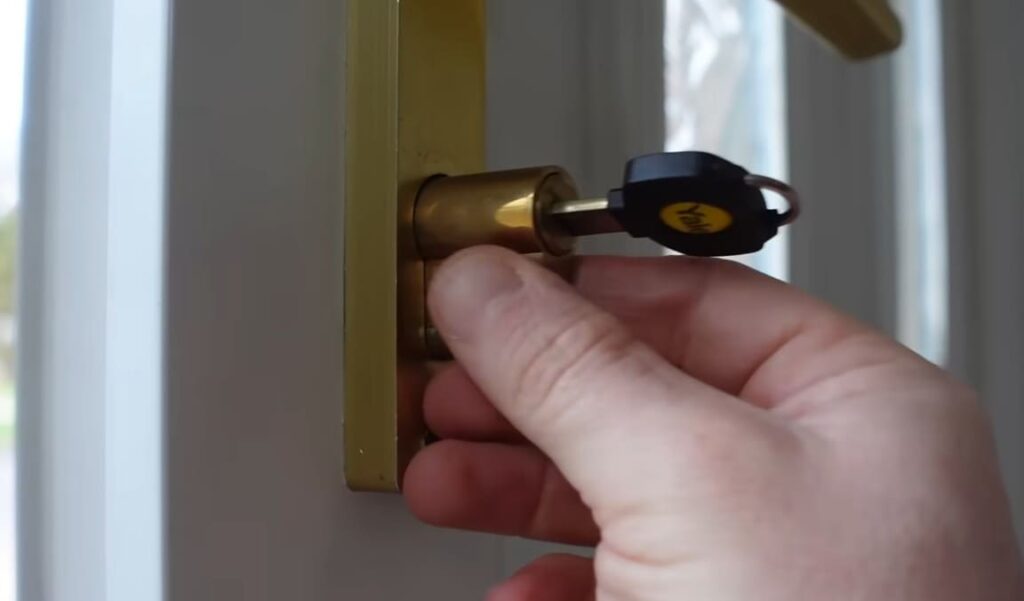
Now comes the moment to position the new components and fasten them securely. This phase is where your careful preparation pays off, leading to a robust and reliable security upgrade.
The first step is to insert the new latch into the edge of the door. Crucially, the angled side must face the strike plate. This orientation allows the door to close correctly and smoothly.
Next, align the main lock assemblies through the borehole. Hold both sides together and begin securing them with the provided screws. Tighten them gradually to ensure even pressure and avoid misalignment.
Once the new unit is in place, test the key. It should turn freely without any resistance. The bolt must extend completely into the strike plate for full engagement.
If you are fitting a lever handle, ensure the handles are orientated for your specific door swing. This is vital for ergonomic use and proper function.
The final step involves testing the handle operation and the spring return. Confirm the mechanism works as intended. Double-check all screws are firm, but avoid overtightening, which can cause binding.
Tips for Ensuring Proper Fit and Security
The difference between adequate and exceptional home safety often lies in the details of alignment. A perfectly fitted mechanism is your property’s silent guardian. These practical pointers help you sidestep common errors and achieve a robust defence.
Avoiding Common Installation Mistakes
One frequent error is skipping the test-fit of new components. This oversight can cause immediate misalignment and lead to premature hardware failure. Always make sure everything seats correctly before final tightening.
A dragging or sagging door places immense strain on the latch. This friction can wear parts quickly. The simple fix is to tighten all hinge screws firmly. This corrects the door’s position and reduces stress.
Crucially, the latch must hit the exact centre of the strike plate box. If it doesn’t, the bolt cannot fully extend. This misalignment compromises the entire step of securing the entryway.
| ADA Requirement | Specification | Purpose |
|---|---|---|
| Mounting Height | 34″ to 48″ above floor | Ensures accessibility for all users |
| Operating Force | 5 lbs. or less | Allows easy use without excessive strength |
| Lever Type | Return-to-centre design | Prevents catching on clothing or bags |
Enhancing Home Security with Accurate Alignment
For maximum resistance to forced entry, anchor your strike plate with three-inch screws. These long fasteners penetrate deep into the wooden frame, not just the trim. This turns the entire jamb into a solid anchor point.
A door is only as strong as its weakest point of attachment. Reinforcing the strike plate is a fundamental upgrade.
Final verification of all components is the last critical step. Proper alignment ensures your security measures are effective against prying or impact. It guarantees the hardware performs exactly as the manufacturer intended.
Troubleshooting and Testing Your New Lock
Ensuring your freshly installed mechanism functions correctly requires a series of simple but critical checks. This verification process confirms your property’s security is fully operational and reliable.
Post-Installation Functionality Checks
Begin with a full operational test. Open and close the entryway repeatedly. Your new lock should engage smoothly every time without hesitation.
Encounter a stiff key? A small amount of graphite-based lubricant is the recommended solution. Crucially, never use oil. It attracts dust and leads to sticking.
If the mechanism binds, try loosening the mounting screws slightly. You can also realign the strike plate. Make sure the latch retracts fully into its housing.
Persistent issues often stem from incorrect sizing. Verify the backset and door thickness match your hardware’s specifications. This is a vital step often overlooked.
When to Seek Professional Assistance
Sometimes, a problem requires expert insight. If you are uncertain about the next step, it is wise to contact a professional.
Seek a locksmith accredited by the Master Locksmiths Association. They possess the tools and knowledge for complex adjustments.
Testing from both sides of the entry is non-negotiable for confirmed security.
This final check guarantees your home remains accessible to you and secure from others. Do not skip this essential procedure.
Maintaining Your Door Locks for Longevity
Your home’s first line of defence remains robust only with periodic inspection and upkeep. Consistent care extends the life of your hardware significantly. This simple practise safeguards your property’s access points for years.
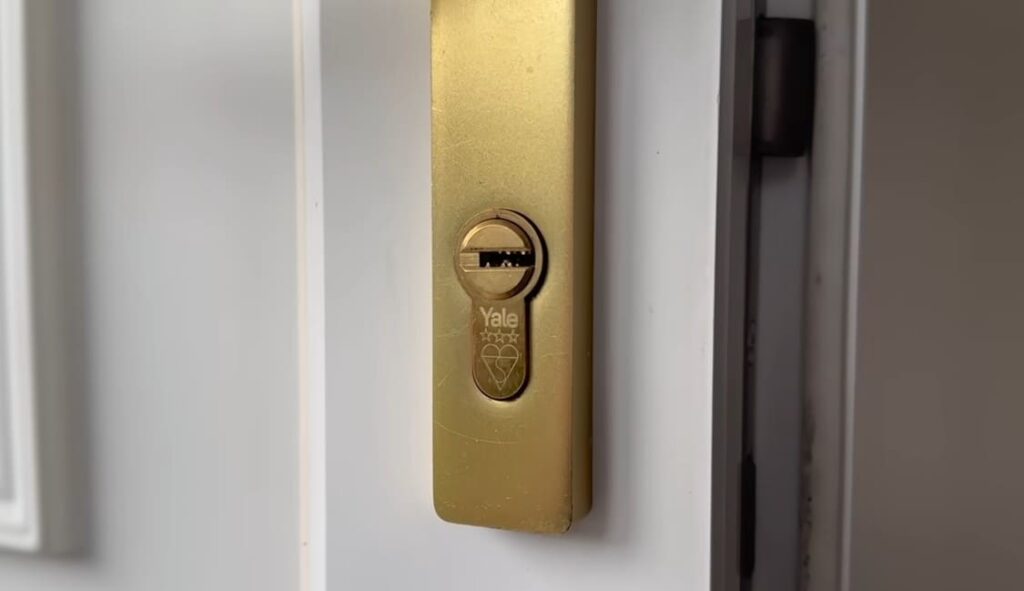
For maximum security, consider a 3-star BSI kite mark cylinder on exterior entries. This certification offers superior protection against snapping and drilling attacks. If you have wooden doors, ensure mortise locks meet the BS 3621 standard. Many insurance providers require this British Standard.
A regular maintenance routine keeps everything functioning smoothly. Follow these key actions to preserve your investment:
- Clean and lightly lubricate moving parts annually. Use graphite-based products, never oil.
- Check that every part remains tight. This includes faceplates and strike plates.
- Inspect for early signs of rust or wear. Address minor issues before they grow.
- Test the operation from both sides regularly. Smooth action indicates good health.
By keeping your door locks in excellent condition, you avoid emergency call-outs. This proactive approach ensures your security measures perform at their peak. Immediate attention to stiffness or looseness prevents total mechanism failure.
Conclusion
Your well-executed installation on the main entrance delivers lasting safety and confidence. Upgrading front door mechanisms is one vital project boosting property security significantly.
Whether fitting new lock hardware for enhanced protection or swapping old locks, our guide’s steps lead to professional finishes. Accurate measurements and proper tools form the foundation of durable setups serving you for years.
Remember, precision during installation prevents future issues. It ensures smooth operation and robust defence against intrusions.
If the process ever feels overwhelming, do not hesitate to contact certified professionals. Their expertise guarantees flawless results.
By prioritising this task, you achieve more than just improved hardware for your front door. You gain the profound peace of mind that comes with knowing your household is properly safeguarded.